It’s July in Florida, and your air conditioner has been working hard for months. But you start to notice something… it’s just not keeping up like it used to. The house feels a little warmer, a bit more humid, and the AC seems to be running longer than ever but achieving less. This gradual decline in cooling performance is a common and incredibly frustrating problem many homeowners face right in the middle of summer. It leaves you wondering if a major breakdown is just around the corner.
Before you panic, it’s important to know that many issues can cause this drop in performance, ranging from simple fixes you can do yourself to more complex problems that require a professional. This troubleshooting guide will walk you through the potential causes, starting with the easiest things to check, so you can diagnose what might be happening with your system. And when you’ve done all you can, the experts at Richard’s AC are ready to step in and restore that crisp, cool air you depend on.
Start with the Simple Stuff: Easy DIY Checks
Before assuming the worst, always start with the most common and easily correctable culprits. You might be surprised to find that a simple five-minute fix can solve your problem.
1. Check the Air Filter: The #1 Suspect
We can’t say it enough: a dirty air filter is the number one cause of reduced AC performance. After running heavily through May and June, your filter has trapped a massive amount of dust, pollen, and debris. Once it becomes clogged, it acts like a wall, severely restricting the flow of air into your system. When your AC can’t get enough air, it can’t cool your home effectively.
What to do: Locate your system’s air filter (often in a slide-in slot near the indoor air handler or in a large return vent in the wall or ceiling). Pull it out and hold it up to a light. If you can’t see light through it, it’s long overdue for a change. Replace it with a new, clean filter, making sure the arrows on the filter frame point in the direction of the airflow. This simple action alone can dramatically improve your AC’s cooling power and efficiency.
2. Verify Your Thermostat Settings
It may sound overly simple, but accidental changes to thermostat settings happen all the time. Before calling for service, do a quick check:
- Ensure the thermostat is set to “Cool” mode, not “Heat” or “Fan Only.”
- Verify that the set temperature is lower than the current room temperature. Your AC won’t turn on if the room is already cooler than the setting.
- If your thermostat uses batteries, a low battery can sometimes cause erratic behavior. Replace them if you haven’t in a while.
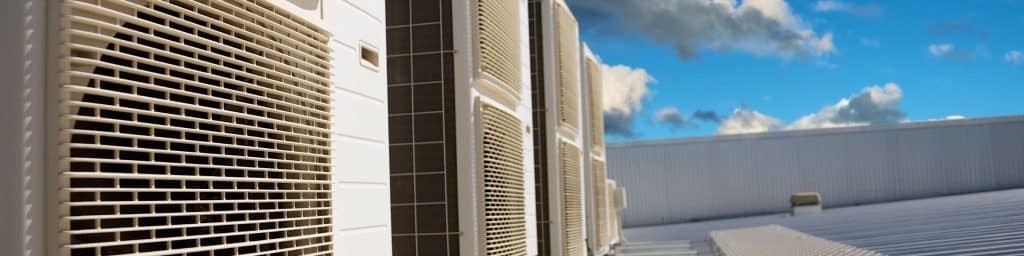
3. Inspect the Outdoor Unit (Condenser)
Your outdoor unit needs to “breathe” to release the heat it has removed from your home. Over time, grass clippings from mowing, falling leaves, dirt, and overgrown shrubs can crowd the unit and clog the metal fins. This buildup traps heat, forcing your system to work harder and reducing its ability to cool.
What to do: Ensure there is at least a two-foot clearance around the entire outdoor unit. Trim back any bushes or plants. If the fins look caked with dirt or grass, you can gently rinse them off with a garden hose on a low-pressure setting. Never use a pressure washer, as it can easily bend and damage the delicate fins.
Intermediate Problems: When It's More Than Just Dirt
If the simple checks above don’t solve the problem, the issue might be a bit more complex, often stemming from the problems we just discussed.
4. Frozen Evaporator Coils
Reduced airflow from a very dirty filter or another issue like low refrigerant can cause the indoor evaporator coils to get too cold and freeze over, forming a block of ice. This ice completely stops air from passing through, meaning no cooling can happen.
What to look for: You may need to open the access panel on your indoor air handler to see the coils. Look for visible ice or heavy frost. You might also see ice forming on the refrigerant lines running from the unit. If you see ice, turn your AC system completely OFF but leave the fan running (set the thermostat to “Fan Only”). This will help the ice melt. A frozen coil is a symptom of another problem (usually poor airflow or low refrigerant) that needs to be addressed.
5. A Clogged Condensate Drain Line
As your AC removes humidity, the water drips into a drain line. If this line gets clogged with algae and sludge, water can back up. Many systems have a safety float switch that will shut down the outdoor condenser unit to prevent water damage, while the indoor fan continues to run. This results in warm, humid air blowing from your vents. If you notice water pooling near your indoor unit, this is a likely cause.
The More Serious Culprits: When You Need a Professional
If you’ve run through the DIY checks and still aren’t getting cold air, it’s time to call a professional from a trusted company like Richard’s AC. The problem likely lies with a component that requires expert diagnosis and tools.
6. Low Refrigerant (Due to a Leak)
This is a very common reason for a gradual decline in cooling performance. Refrigerant is the substance that absorbs and releases heat. If your system has a slow leak, the refrigerant level will drop over time, and so will your AC’s cooling capacity. Your system will run longer but cool less effectively.
Remember: Refrigerant is in a closed loop; low levels always mean there is a leak. A certified technician from Richard’s AC needs to find the leak, repair it, and then recharge the system to the correct level.
7. A Failing Capacitor
The capacitor is like a battery that provides the powerful jolt needed to start your AC’s motors. In Florida’s intense heat, capacitors are a frequent failure point. When one is weakening or has failed, the fan motor or compressor may struggle to start or run at full power, resulting in poor cooling. This is a relatively inexpensive fix for a professional.
8. An Aging Compressor
The compressor is the heart of your system. As it ages, internal wear can cause it to lose its ability to effectively compress refrigerant. This results in a slow, steady decline in cooling ability over a season or two before it eventually fails completely.
9. Leaky Ductwork
If your home’s air ducts have developed leaks or cracks in the attic or crawlspace, a significant portion of the cold air your AC produces is being wasted before it ever reaches your rooms. This forces the system to run longer and makes it seem much less powerful than it actually is.
Your Mid-Summer Action Plan
If your AC isn’t cooling like it used to, follow these steps in order:
- Change the air filter. It's the easiest and most common fix.
- Verify your thermostat settings are correct.
- Inspect and clean the area around your outdoor unit.
- Look for signs of ice on the indoor unit or refrigerant lines. If you see any, turn the cooling OFF and let the fan run to thaw it.
- If the problem persists, turn the system off and call a professional. Continuing to run a malfunctioning AC can cause more severe damage.
Why Call Richard's AC for a Performance Diagnostic?
When simple fixes don’t work, you need an expert diagnosis to avoid wasting money on guesswork. The experienced technicians at Richard’s AC don’t just look for what’s broken; we find out why it broke. We have the professional tools to accurately measure refrigerant pressures, test the health of capacitors and other electrical components, and thoroughly inspect the entire system. An expert diagnosis from Richard’s AC ensures the correct problem is fixed efficiently, restoring your cool comfort and preventing a minor issue from becoming a major mid-summer breakdown.
Don’t Settle for Subpar Cooling
A decline in your AC’s performance isn’t something you just have to “live with” during the Florida summer. It’s a clear sign that your system needs professional attention. Addressing it promptly will save you money on energy bills and prevent more serious repairs down the road.
Feeling the heat more than you should? Contact Richard’s AC for a performance diagnostic and get your cool back!
Let us help you enjoy a cool and comfortable home all summer long!